
September 27, 2022
How can one design a seating chart with 24 unique students? Do you use rows or groups, or the E 3 look like the teacher next door? What would work for my students and me to make learning more engaging and accessible? Of all the possibilities, how do I choose one that will work best? These thoughts ran on a repetitive loop as I looked around my room at the 24 expected desks and realized I wasn’t sure how to arrange seating charts. There was data strewn about my desk with the latest reading and test scores. Sticky notes were labeled with names read to be placed on a seating chart page that remained as blank as when I grabbed it from the printer earlier.
When designing a seating chart, it is important to have strategic plans. In math, I like to have students work on new concepts with students that are at a different level than them. I like the levels to be close so that they can work with each other. If the levels are too spaced it is sometimes harder for them to work together on a concept if one grasps it better right away. In homeroom reading, I tend to try for the same strategic groupings. During our reading and math skills groups, I have students coming from different homeroom classes. Sometimes I need students in islands for testing or working on independent work. Other times I need them in groups. Occasionally I want the whole class to be in a discussion and see each other.
It was at this moment of not knowing how to decide between rows or groups that I realized I didn’t have to decide. My classroom of fifth graders coming was going to be active, responsible, and highly motivated to do well, as that was my expectation for them. They are willing to try new things. So why not try a revolving seating chart and plan?
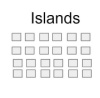 Islands
As students came in on the first day of school, I could see the look on their faces as they realized that the desks were arranged in islands in 4 rows going across the room and 6 columns. Their name tags were already on their desks. For elementary students accustomed to seating in groups and being with friends, this looked like an utterly boring way to learn. After introducing myself and taking attendance, I explained to them the seating formation of islands. They learned their column and row number. We practiced bringing up supplies and doing activities based on these numbers.
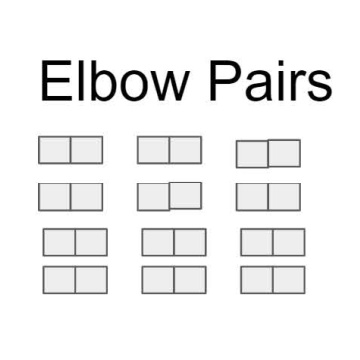
Elbow Pairs:
After working on a get to know me project, students in Column 1 moved their desks next to Column 2, Column 3 moved next to Column 4, and Column 5 moved next to Column 6 for Elbow pairs to share. They loved getting to move their desks and getting the chance to whisper talk with someone. They realized that their desk had to remain clean if anything dropped out of their desk, there would be a fine
 Group Team:
Further on that day, I had the pairs in Row One move back to be the pair sitting behind them in Row 2 and those in Row 3 to move to be with Row 4. This took about 15 seconds for them to go from pairs to being in six groups of four throughout the classroom. They realized that it also created a larger space so that we could do a welcome back experiment together and be able to all see and talk to each other.
For the first week, these were about the only rotations that I emphasized. It took lots of practice to move the desks and chairs; however, by the end of the two weeks, they could rotate seamlessly throughout them. It was also an important and physical way for us to have key discussions about how learning can look and sound different throughout the day. There are times that students must work independently and other times when we need each other.
Throughout the first month or so, I also taught a couple more rotations as the situations presented themselves. Even students started to recognize that moving desks to new situations to help with learning was something they could suggest.
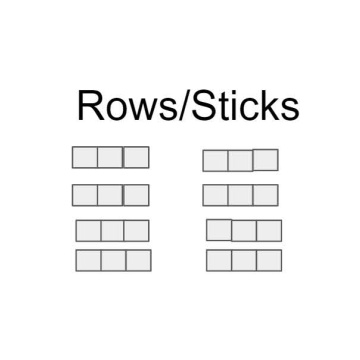 Sticks/Row Formation
This was a common formation throughout the day. It was designed with those on the ends as responsible leaders. They may or may not be high in multiple subjects; however, they are leaders to their peers with a strong work ethic. Students are positioned with someone stronger and weaker in reading and/or math skills on either side of them. There were many pros for this formation. First, from the back of the room, you can see most of the Chromebook Screens. All students can see all the boards. I can assign Dojo groups to be based on rows to be given. It worked well for a variety of Quizlet activities. Also, if students are playing in desks, you can have them do a “backward line” where all the desks are turned around so they can’t get into them.
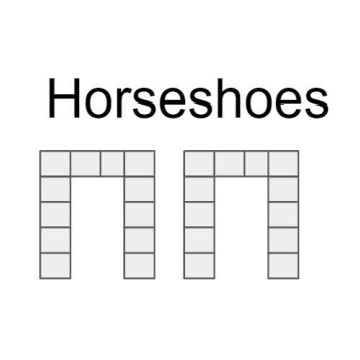
Horseshoe Formation
This one took more configuring and practice, but the students loved it. It got them into bigger teams, and each team had access to one of the whiteboards in the class. This was ideal for any birthday party or celebration as people could pass out treats without getting bumped. It was ideal for talking and debates. However, this didn’t work well when people kept wanting to talk across the classroom.
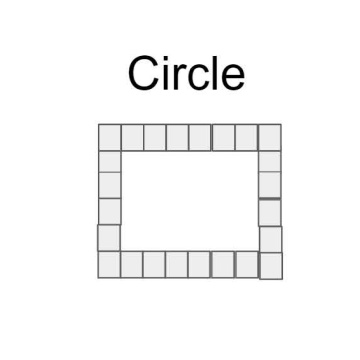
Circle Formation
This allowed the whole class to create a giant oval in the classroom. It was lots of fun to host debates this way. We also reviewed projects and edited essays this way. Students would leave their Chromebooks open, and peers would leave a review or help them edit their work using colored text. I would rotate forwards or backward based on the roll of the dice, so students were reviewing and seeing lots of different work. It was an ideal way to teach responsibility and accountability.
Once we had learned them all, students created a quick video of them explaining the formations to my skills students that rotated in. They also petitioned to change the names of some of the formation. Lines became Kit Kat and such. It was a fun and engaging way that students could take ownership of their learning and seating charts. When new students came (since we don’t like in a perfect world where 24 always happens), we just adapted and moved on. I still mixed up where students sat based on new data, and we’d have to practice where to go, but overall this led to great success with my class and how I saw my teaching days.
With the pandemic, teaching in such a way was hard to keep 6-foot spacing and such. However, I am excited to be planning to start the school year off again in such a way that promotes community and growth amongst students. It not only keeps their desks much cleaner, but it also leads to a fun day broken up with quick transitions. I highly recommend mixing up the same old seating chart plans you have been using and seeing what can happen.
This guest article was written by Jessica Finn while taking the online continuing education course, Teaching Black History Month & Beyond by THI instructor Wendi Fein.
Professional Development
Courses for Educators.
PO Box 1273
Freeland, WA 98249
360.341.3020
360.341.3070 (fax)
NEWSLETTER
Sign up
for new course announcements, specials and Heritage Institute News.